One of the worst things about travel blogging is the need for great photos. Amanda and I are not great photographers by any stretch of the imagination! But we have discovered a tool that helps our mediocre photos look decent, and sometimes even great! That tool is the free Snapseed app. Here are the 5 easy ways we use Snapseed to make our photos look better.
1. Use Looks Filters to Add Pizzazz
You know how things can look bright and defined in real life but capture in photos as a bit blurry and dull? You can recapture the more vivid image your eyes see by using the Looks filters in Snapseed.
Simply upload the photo that lacks pizzazz into the app. At the bottom of the app, you will see three words, Looks, Tools, and Export. Choose Looks and then select your the filter that makes the photo look the best. My favorite filters for scenery shots are Pop and Accenuate. If the photo contains people, Smooth or Portrait are usually better. In some rare occasions, I really like the effect of Morning as well.
Once you choose the one you like best, click on the check mark. Then you will have the option of sharing the photo via text, email, or social media, or exporting it to your phone photo file.
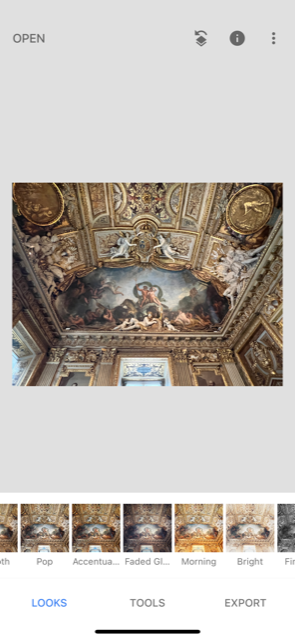
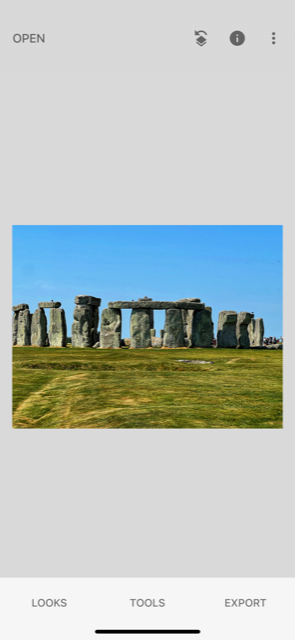
Before Filter:
After Filter:
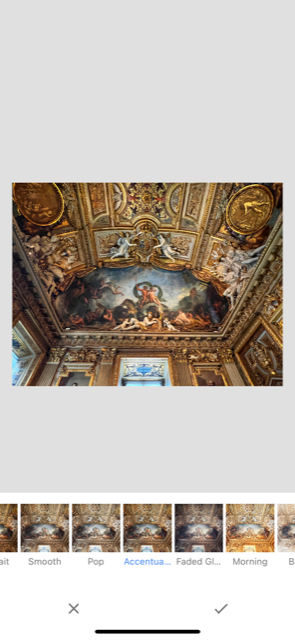
This is one of the many ornately painted ceilings in the Louvre in Paris. See how this one simple change makes the photo details pop? It’s more like it looked in real life!
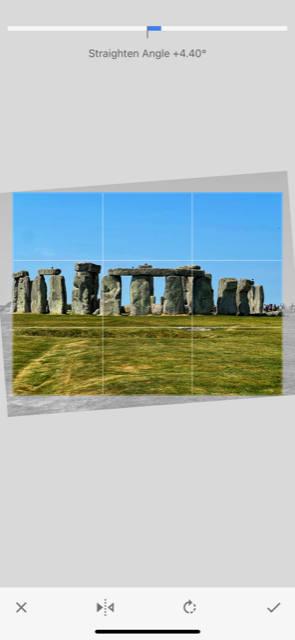
2. Use Rotate to Straighten Image
I’m the world’s worst at holding my phone straight when taking a picture. Inevitably something is a little wonky with the details. Fortunately, there’s an easy fix in Snapseed. Simply select your newly pizzazzed photo in Snapseed and the tap on Tools. Select Rotate from the pop-up menu. Then place your finger on the screen and move it from left to right until you get the photo into alignment. There are handy grid marks to help. Then click the checkmark and save it.
Before Rotation:
During Rotation:
After Rotation:
The best thing about this feature is that if the photo is really crooked (like the one in the before photo above), Snapseed will automatically correct it when you tap on Rotate. Sometimes I will also use the Crop tool in conjunction with Rotate to better focus on my subject. Use Rotate first, then Crop to the dimensions you want in the photo.
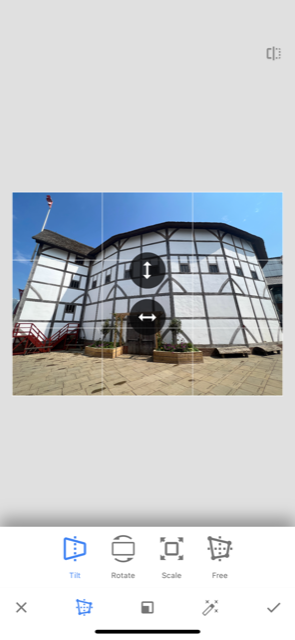
3. Use Perspective to Further Straighten Images
Capturing photos of tall buildings is frustrating. The building often looks crooked because of the perspective. It also can be a problem when you take a photo at a funny angle. Snapseed to the rescue! You can quickly make the building look like it should with the Perspective tool.
Simply upload a photo into Snapseed, tap on Tools, and select Perspective. Make sure the Tilt option is selected. Then simply move your finger up or down or left or right to get the desired perspective.
Before Perspective:

During Perspective:
After Perspective:
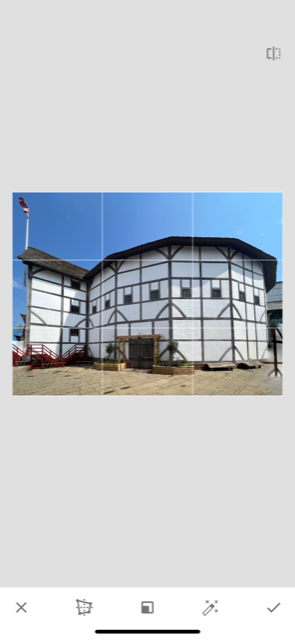
I use this one all the time. The only thing you have to watch is the black space that may appear around the edges of your photo as you change its perspective. Snapseed will simply fill in that empty space with whatever is in the space next to it. This is fine for plain backgrounds but may look wonky if the background is detailed. You may want to use the Crop function in conjunction with Perspective to crop this out.
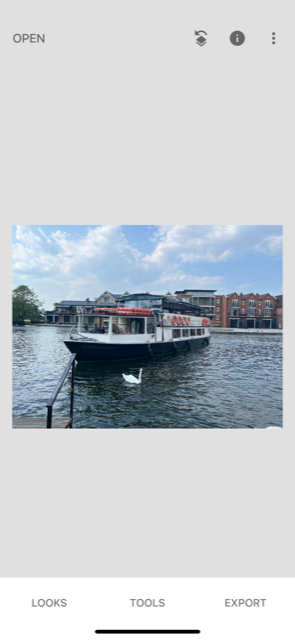
4. Use Healing to Get Rid of Unwanted Objects
Have something in your photo that you don’t want? Erase it! It works best if the object is very small or if the surrounding area is very plain. Simply upload the photo, select Tools, and then select Healing. Then wipe your finger over the area you want to erase. If it’s a tiny area, pinch outwards with two fingers to zoom in on what you want to remove.
Before Filter:
After Filter:
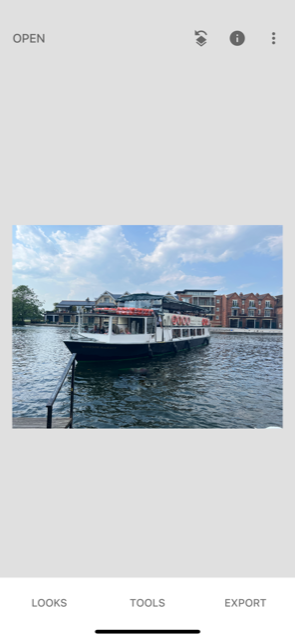
In this example, I removed the swan from the photo. I don’t know why you want to do this in real life, but it’s a good illustration of how this works best. I also won’t admit to using it to erase a few wrinkles here and there . . .
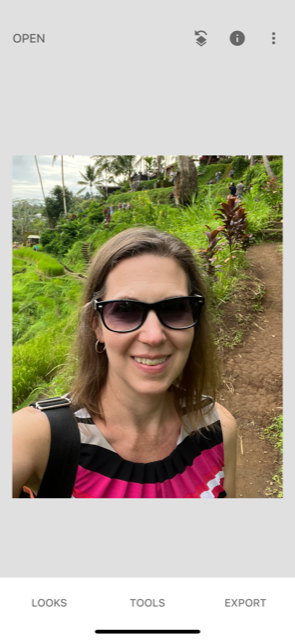
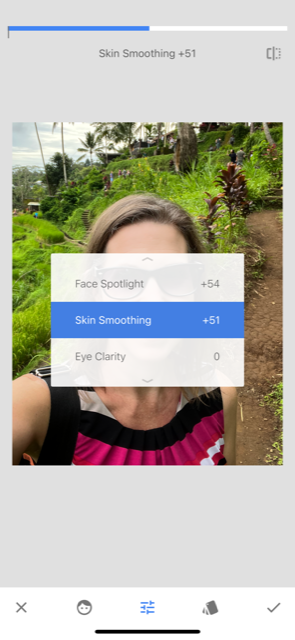
5. Use Portrait & Glamour Glow to Look Better
Speaking of wrinkles, Snapseed can make you look better in your photos. If you want quick fixes, you can use the Smooth or Portrait filters. But if you want to go a step further, use the Portrait or Glamour Glow Tools as well. Use the Portrait tool if you want have brighter and smoother skin and sparkling eyes. Glamour Glow will give your photos a warm soft glow.
Upload your photo, select Tools, and then select Portrait or Glamour Glow. Then play around with it. There are pre-set options, or you can customize to your heart’s desire.
Before Portrait:
During Portrait:
After Portrait:
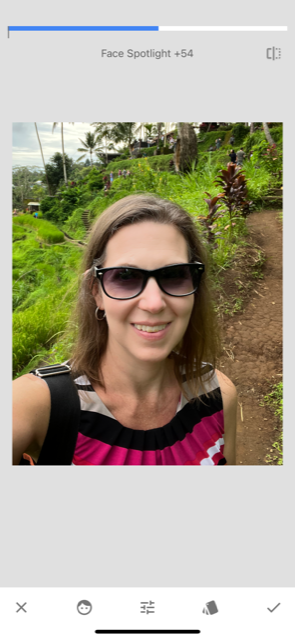
As I mentioned in my post 5 Ways to Look Great in Travel Photos, avoiding selfies is wise. But if you are traveling solo, you might have to take them occasionally – at least if you want to be in the photo! There’s not a huge change in the before and after photos above, but I do think I look a bit better after I brightened my face and smoothed my skin a bit!
You can also use the Brush tool to whiten your teeth. Select Tools, then Brush, then Dodge & Burn. Set Dodge & Burn to 5. Then use your fingers to zoom in on the teeth. Slide your finger from the top of each individual tooth down to the bottom a few times to get to the shade of white you are looking for. Don’t do too much or the end result will look unnatural. And I don’t do it at all because the yellowness in my teeth are fluoride stains that can’t simply be painted out. But the good news is that I never get any cavities because of all of the fluoride I was exposed to as a child!
How do you use Snapseed?
There’s a ton of other ways Snapseed is valuable. If you use it, tell us more tips below! And sign up for our newsletter so you never miss a post!